套索选好后怎么抠出来 ps套索工具怎么抠图
废话不多说,直接上干货!
文章插图
文章插图
一、简单快捷扣图方式
处理简单背景,背景和主题物对比大的,我们就用非常简单的扣图方式,比如橡皮擦工具、魔棒工具、快速选择工具、多边形套索工具、矩形工具、色彩范围、钢笔工具 。这几种方式简单快捷,其中钢笔工具运用最多,最精确,要多运用,才能轻松驾驭 。大家还用到其它简单的扣图工具没,有的评论区见,分享分享 。
二、蒙版扣图
1.图层蒙版扣图
不破坏原图的情况下扣图,复制图层上添加蒙版,用白色画笔,在蒙版上涂抹,白色部分保留,黑色部分去除 。
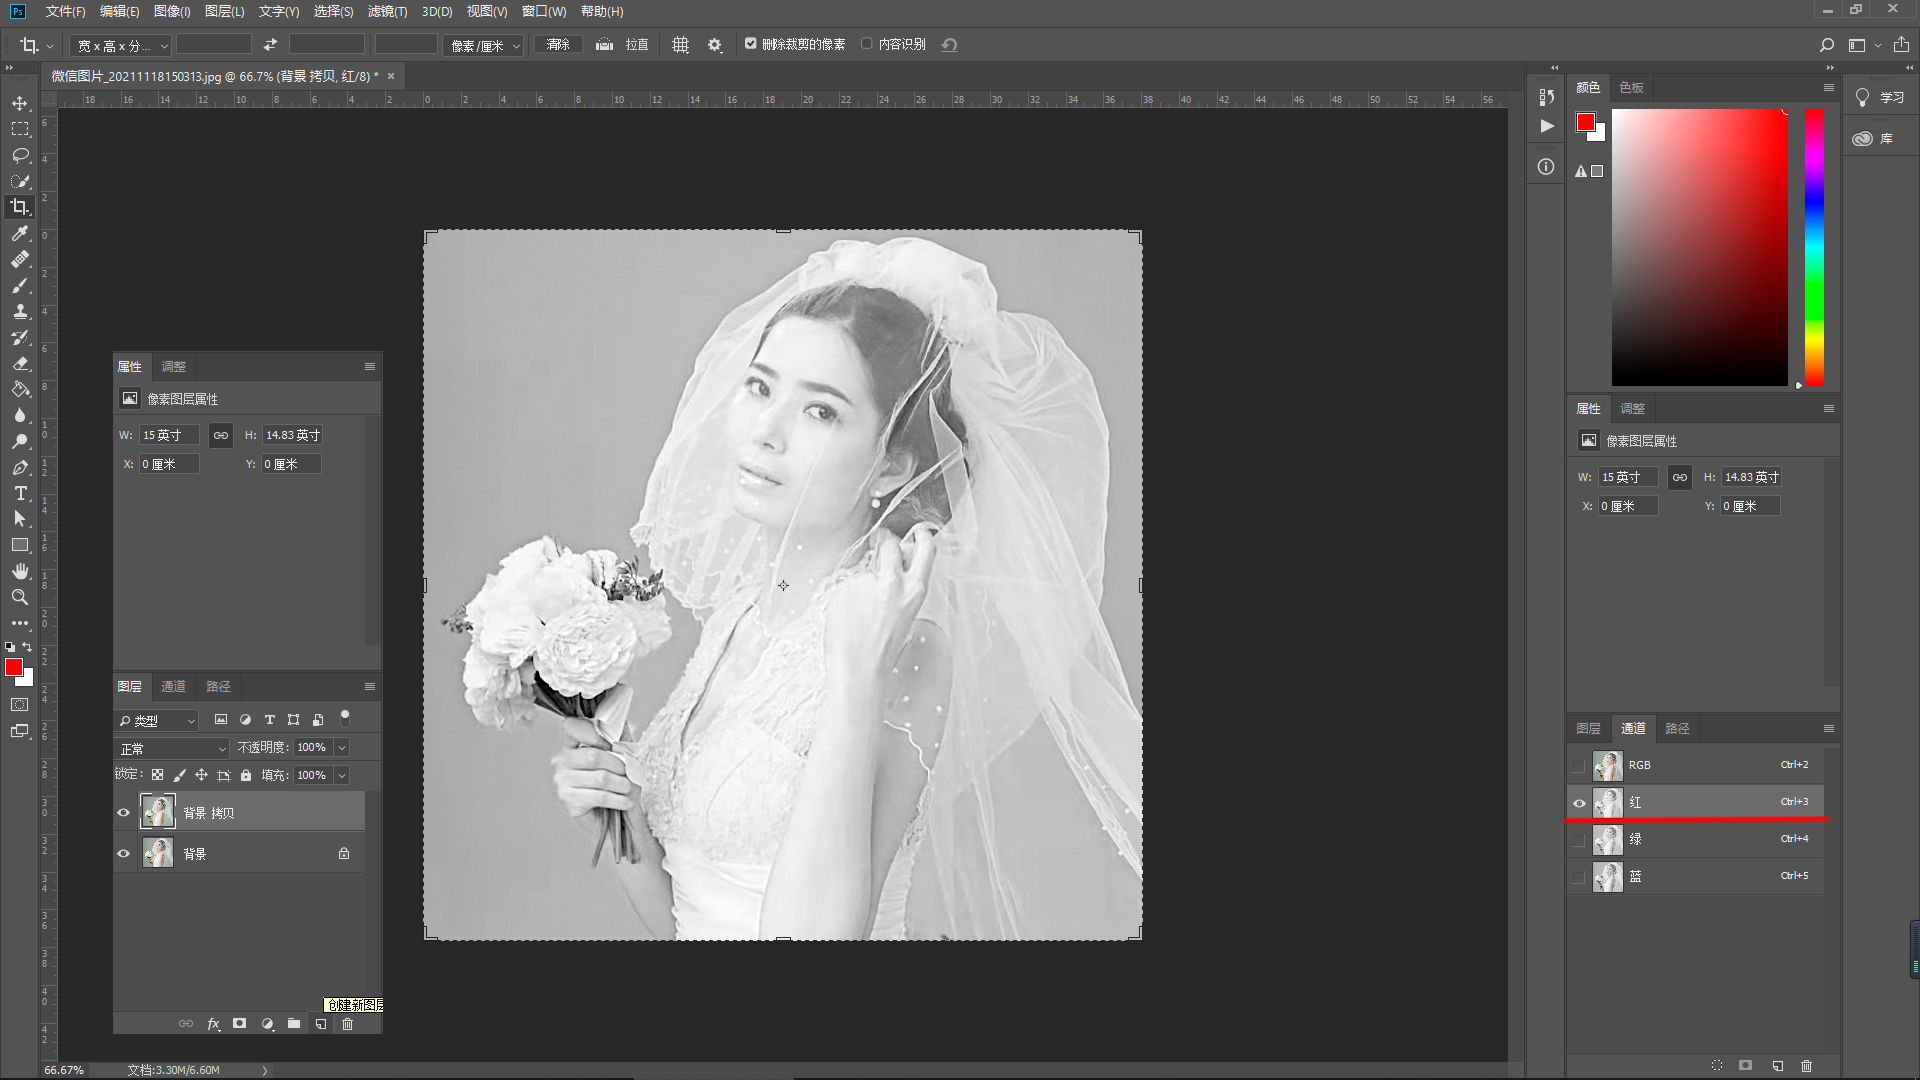
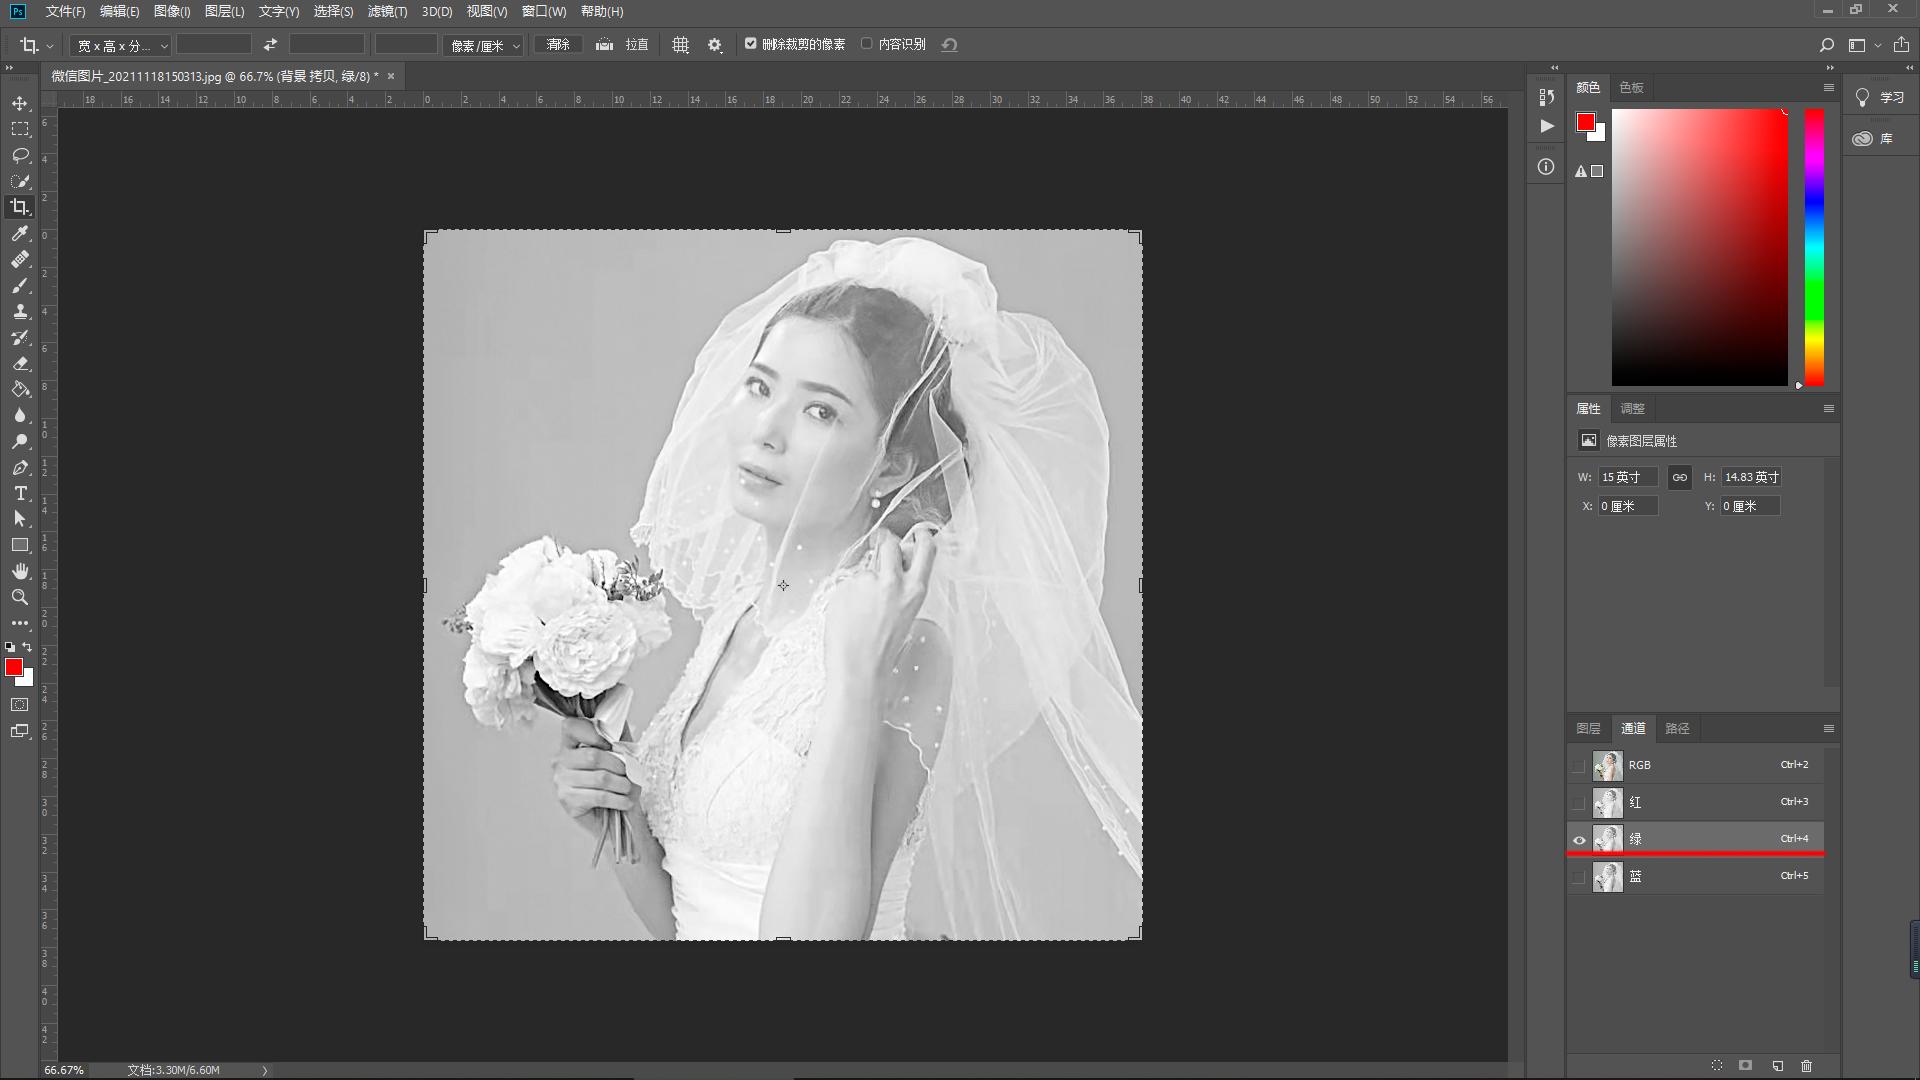
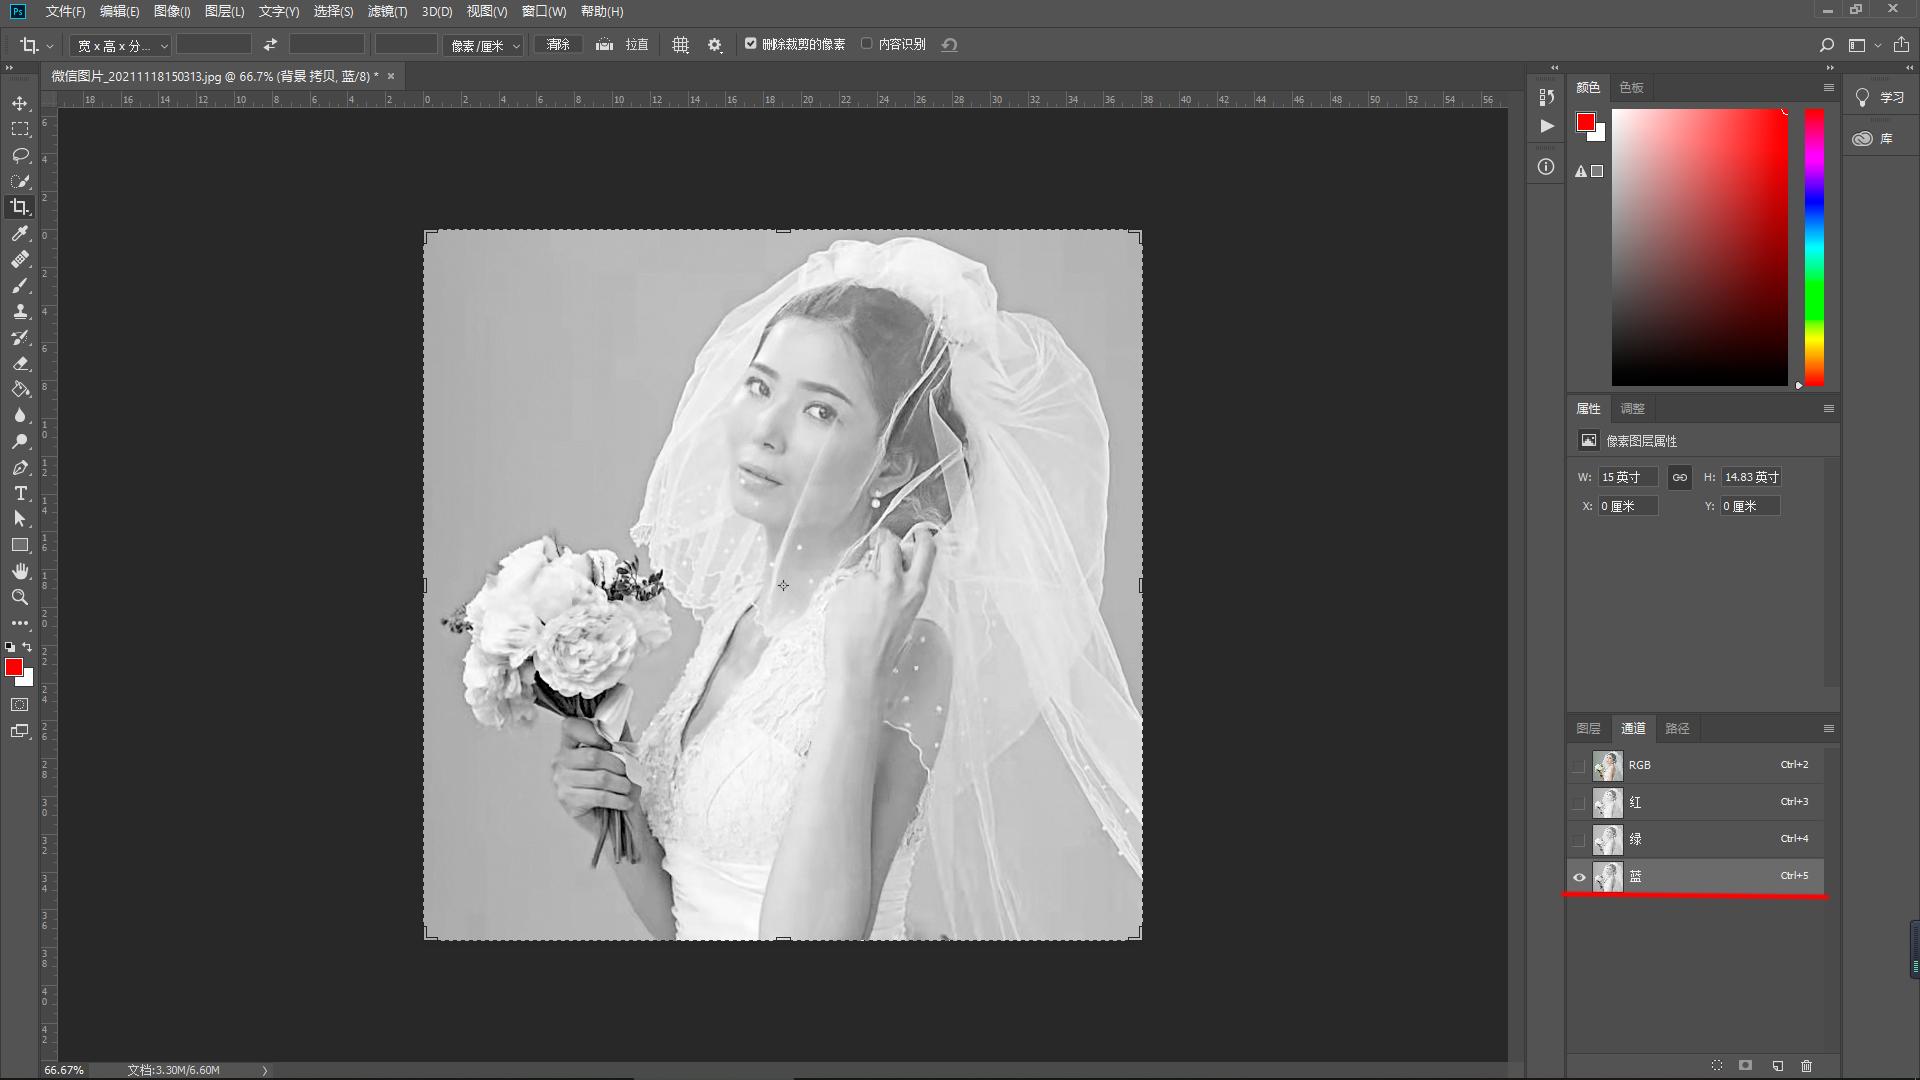
三、通道扣图
通道抠图利用通道计算进行抠图,适合一些背景复杂,形状不规则,透明或半透明的物体,比如树叶、婚纱、玻璃制品等 。
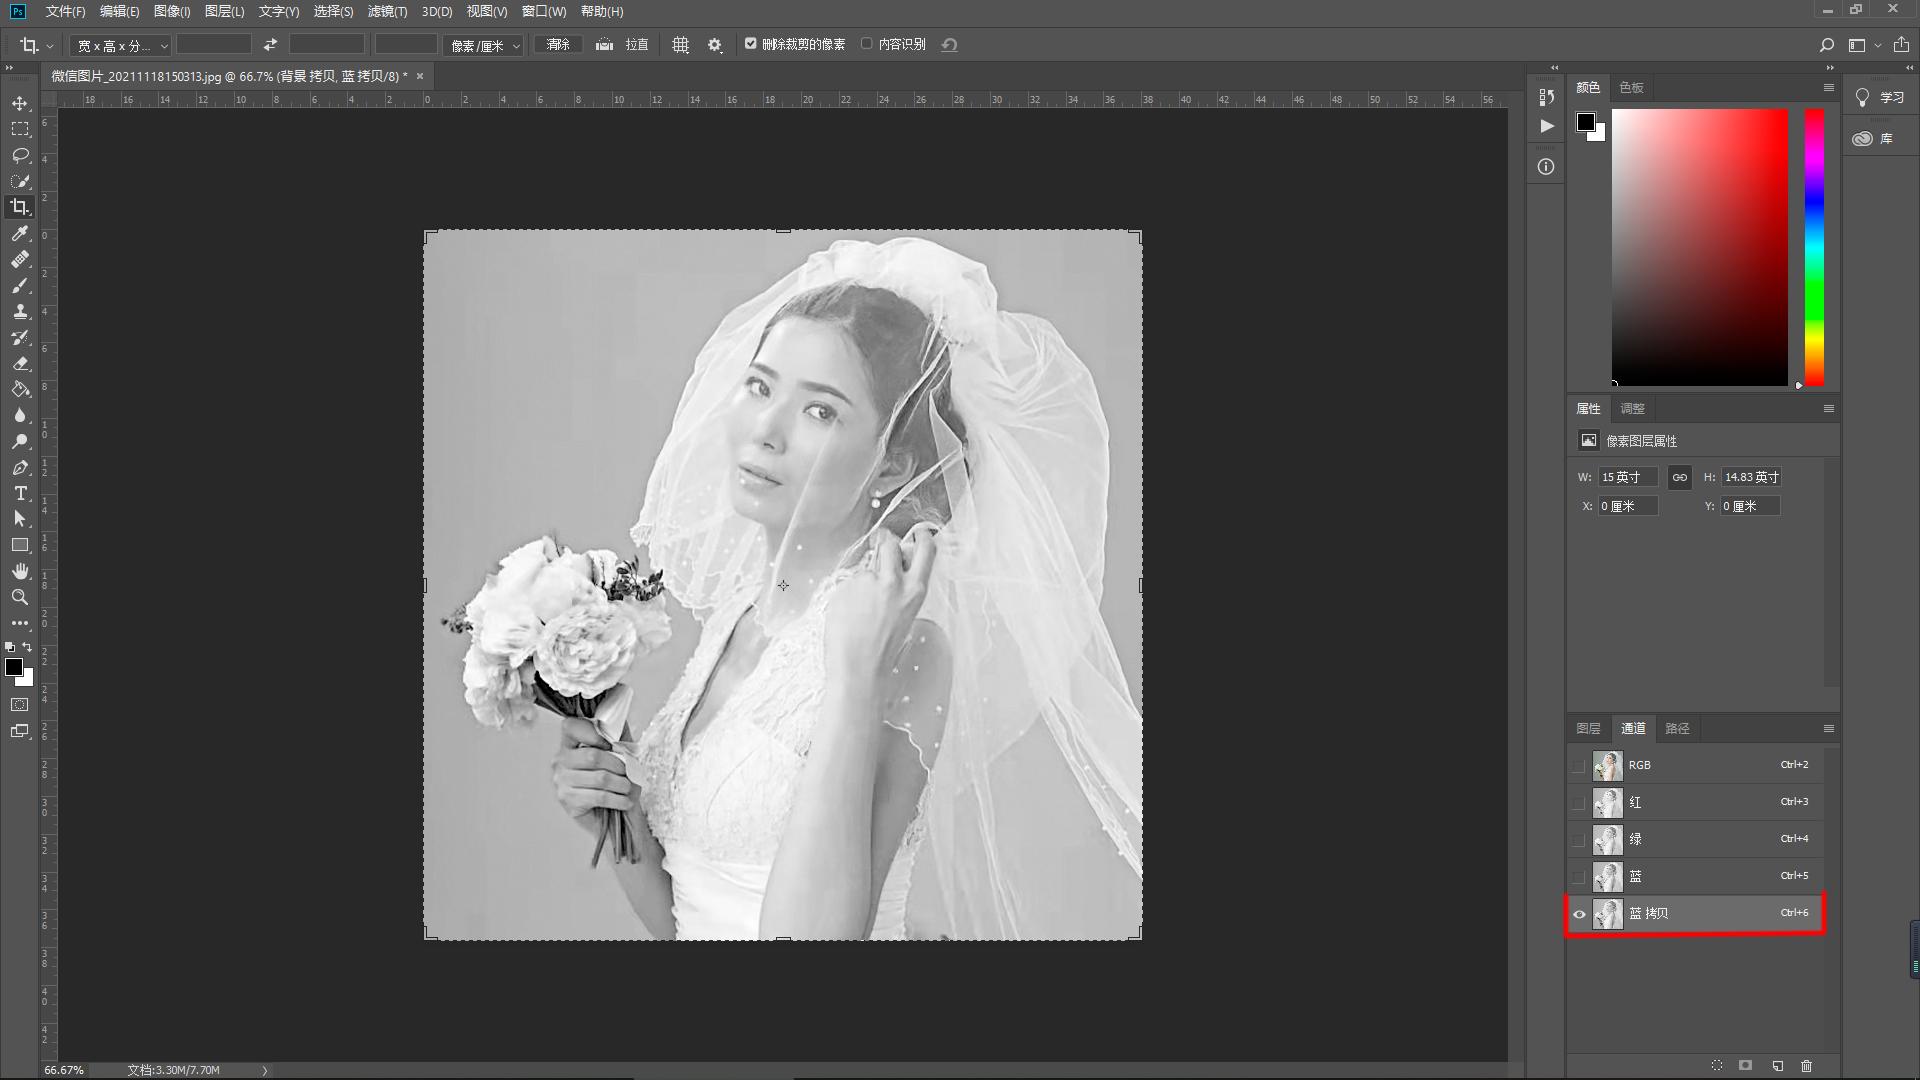
1.复制图层后,进入通道面板,观察红、绿、蓝通道,看哪个通道对比度强烈 。
文章插图
文章插图
文章插图
文章插图
文章插图
文章插图
2.观察后发现蓝通道对比强烈,复制一层蓝通道 。
文章插图
文章插图
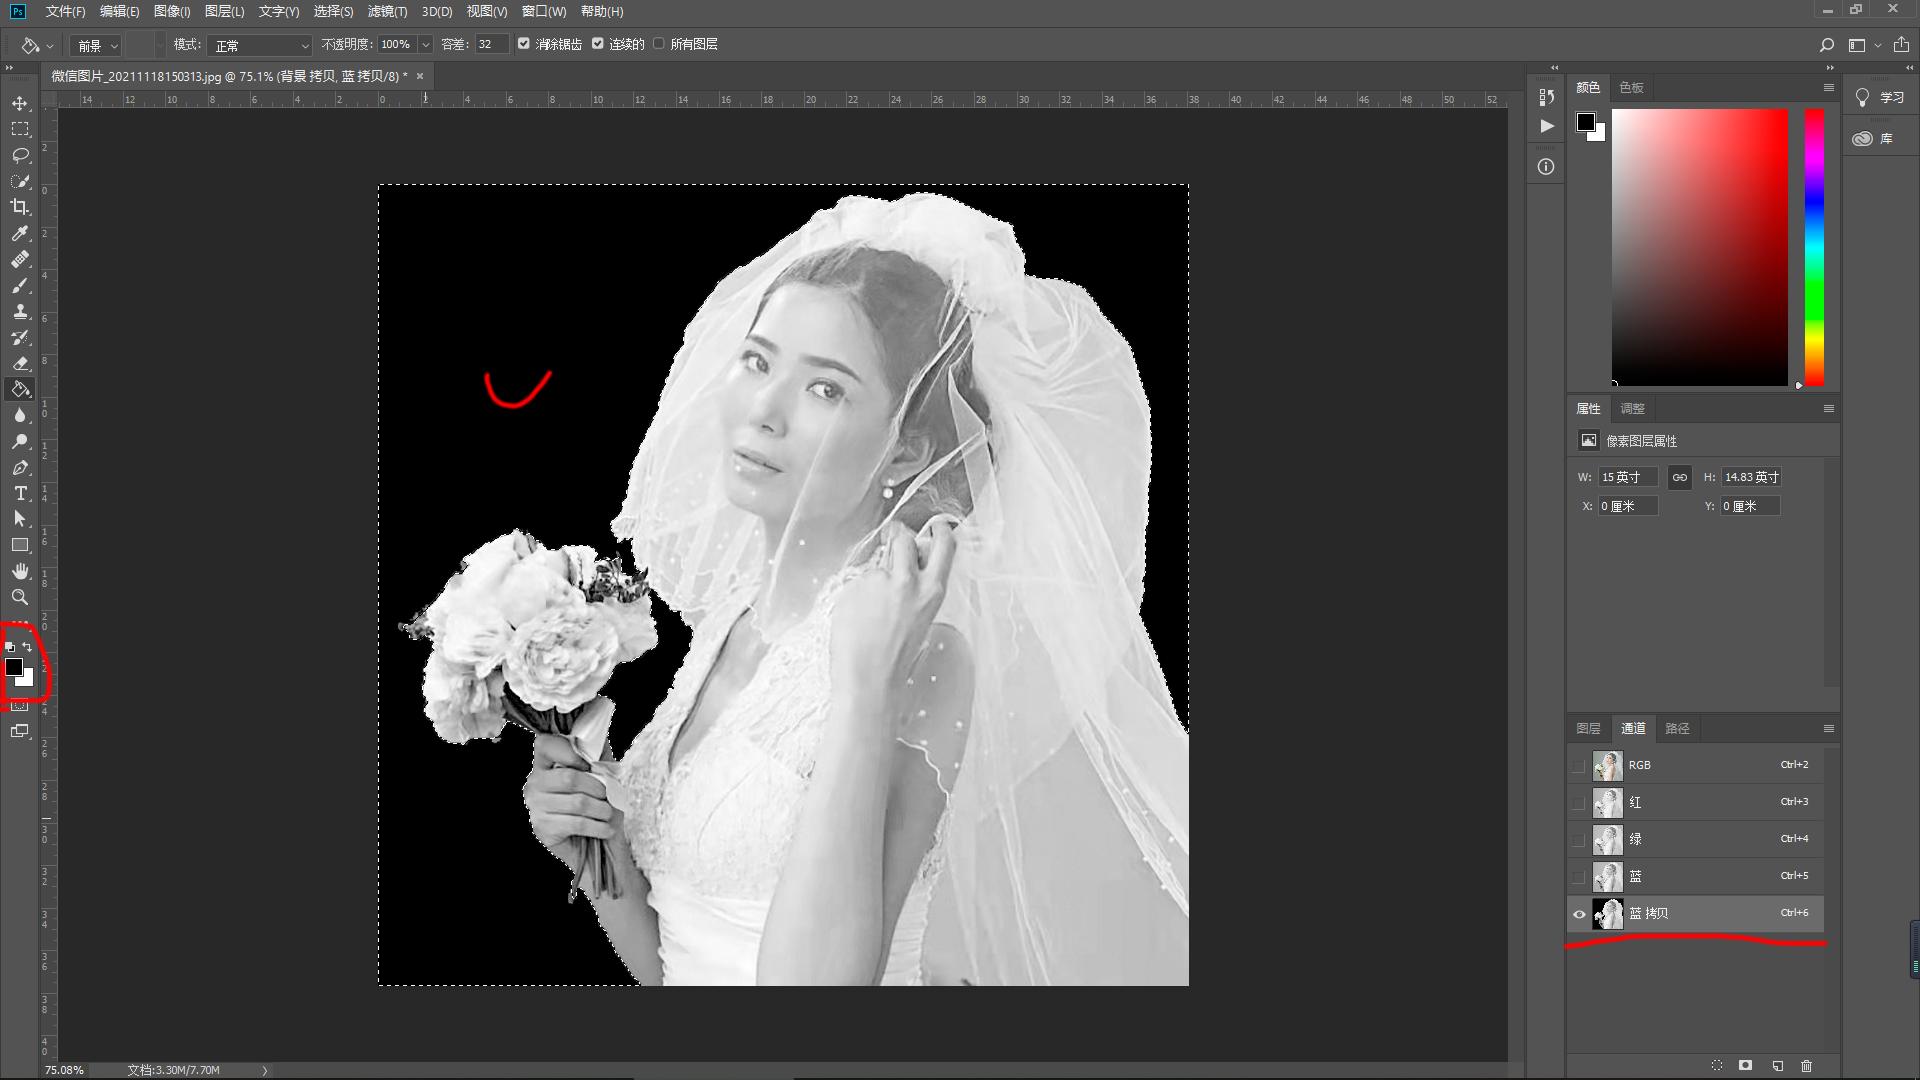
3.用快速选择工具,选出要扣取的部分 。

文章插图
文章插图
4.选择反向,用油漆桶工具给背景填充黑色 。
文章插图
文章插图
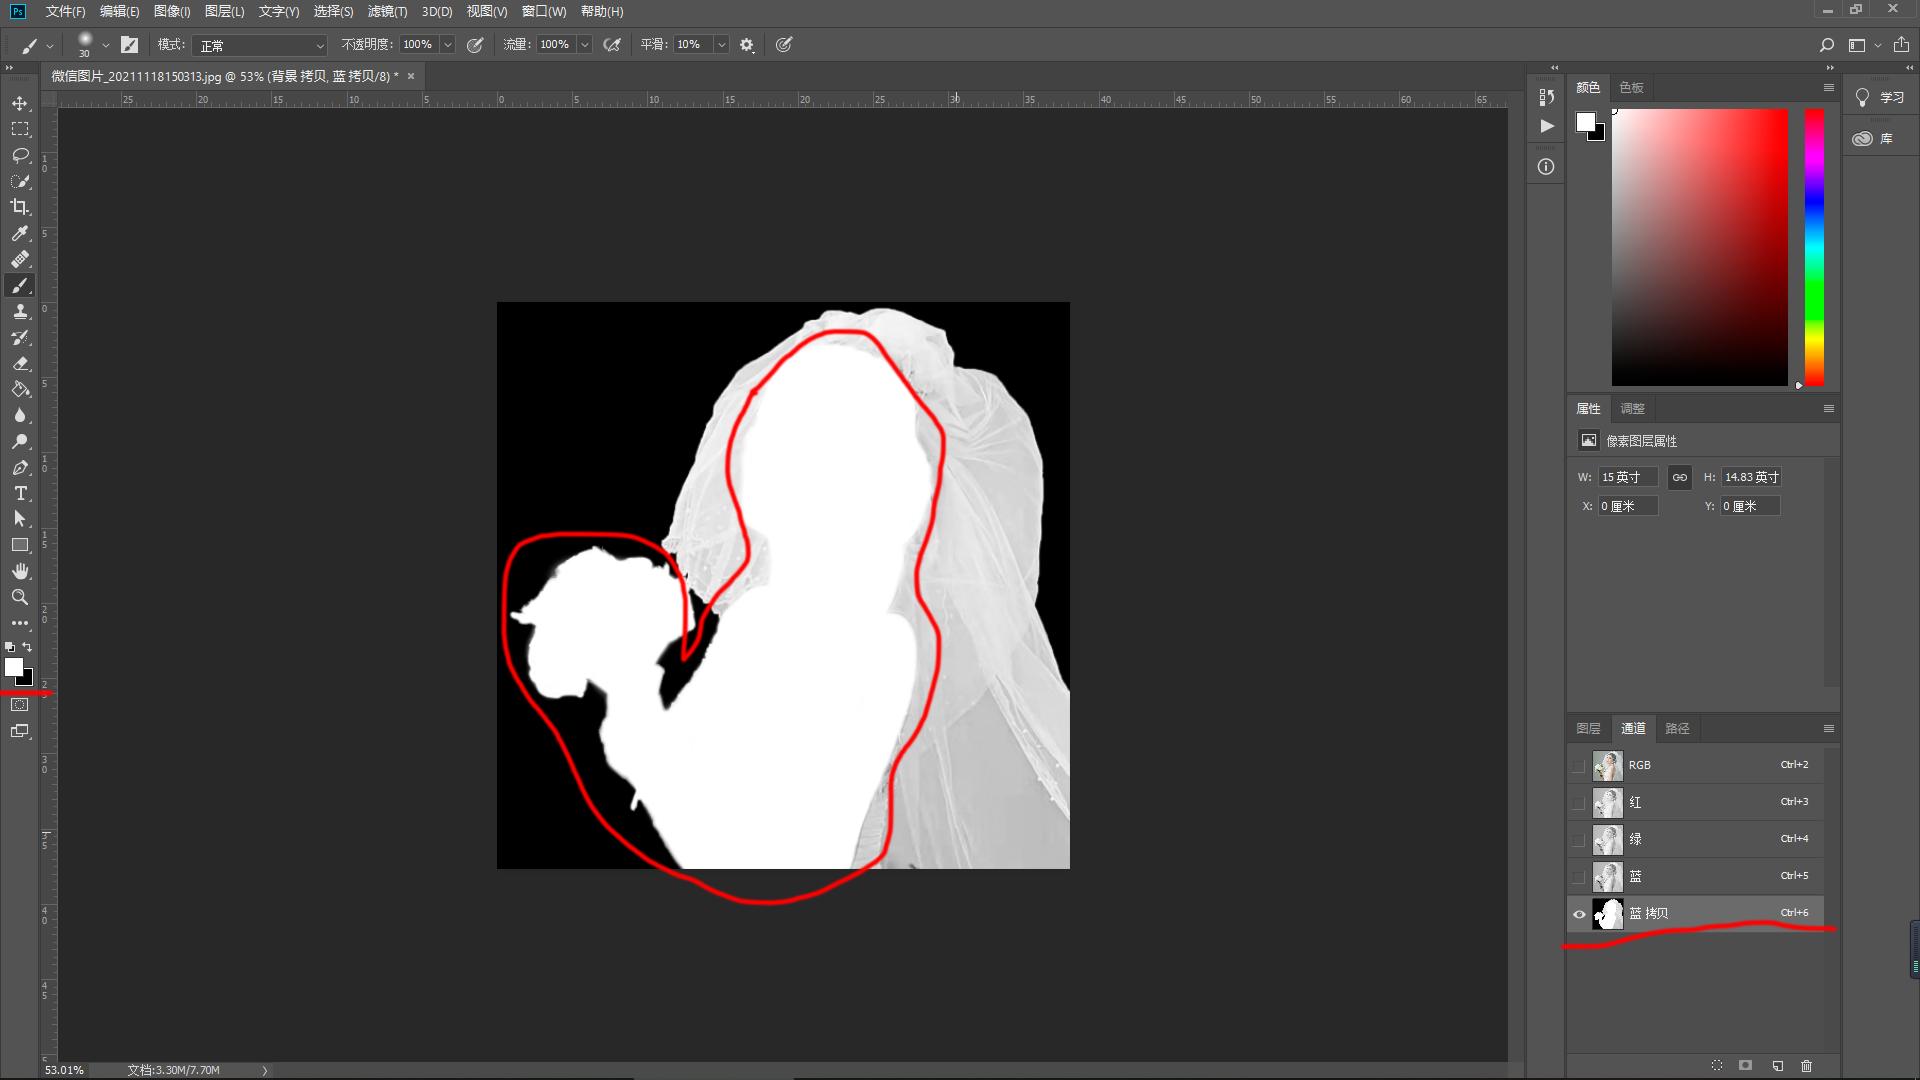
5.用白色画笔工具把不透明部分涂抹 。
文章插图
文章插图
6.回到图层面板,执行选择—载入选区,通道选择蓝拷贝通道 。

文章插图
文章插图
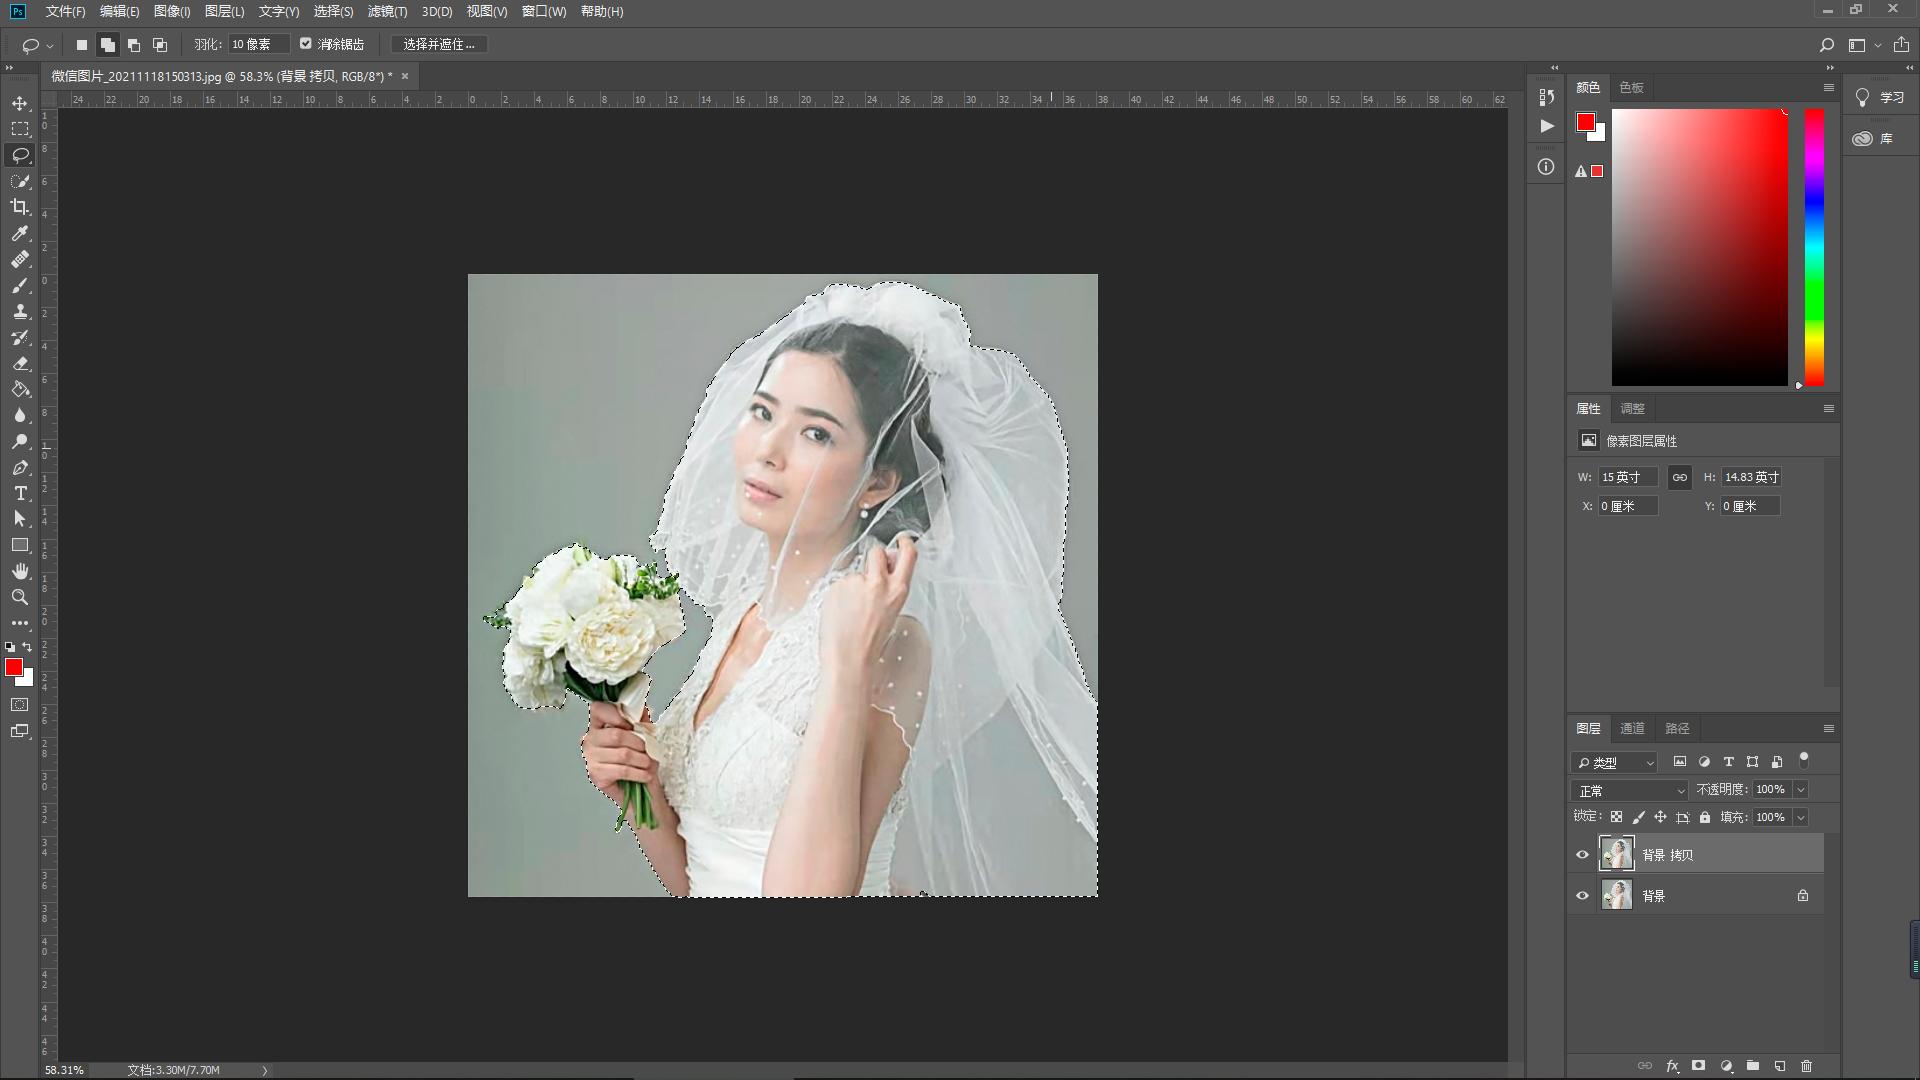
7.抠图完成
文章插图
文章插图
8.新建红色图层,放到抠图图层下面,观察抠图效果 。
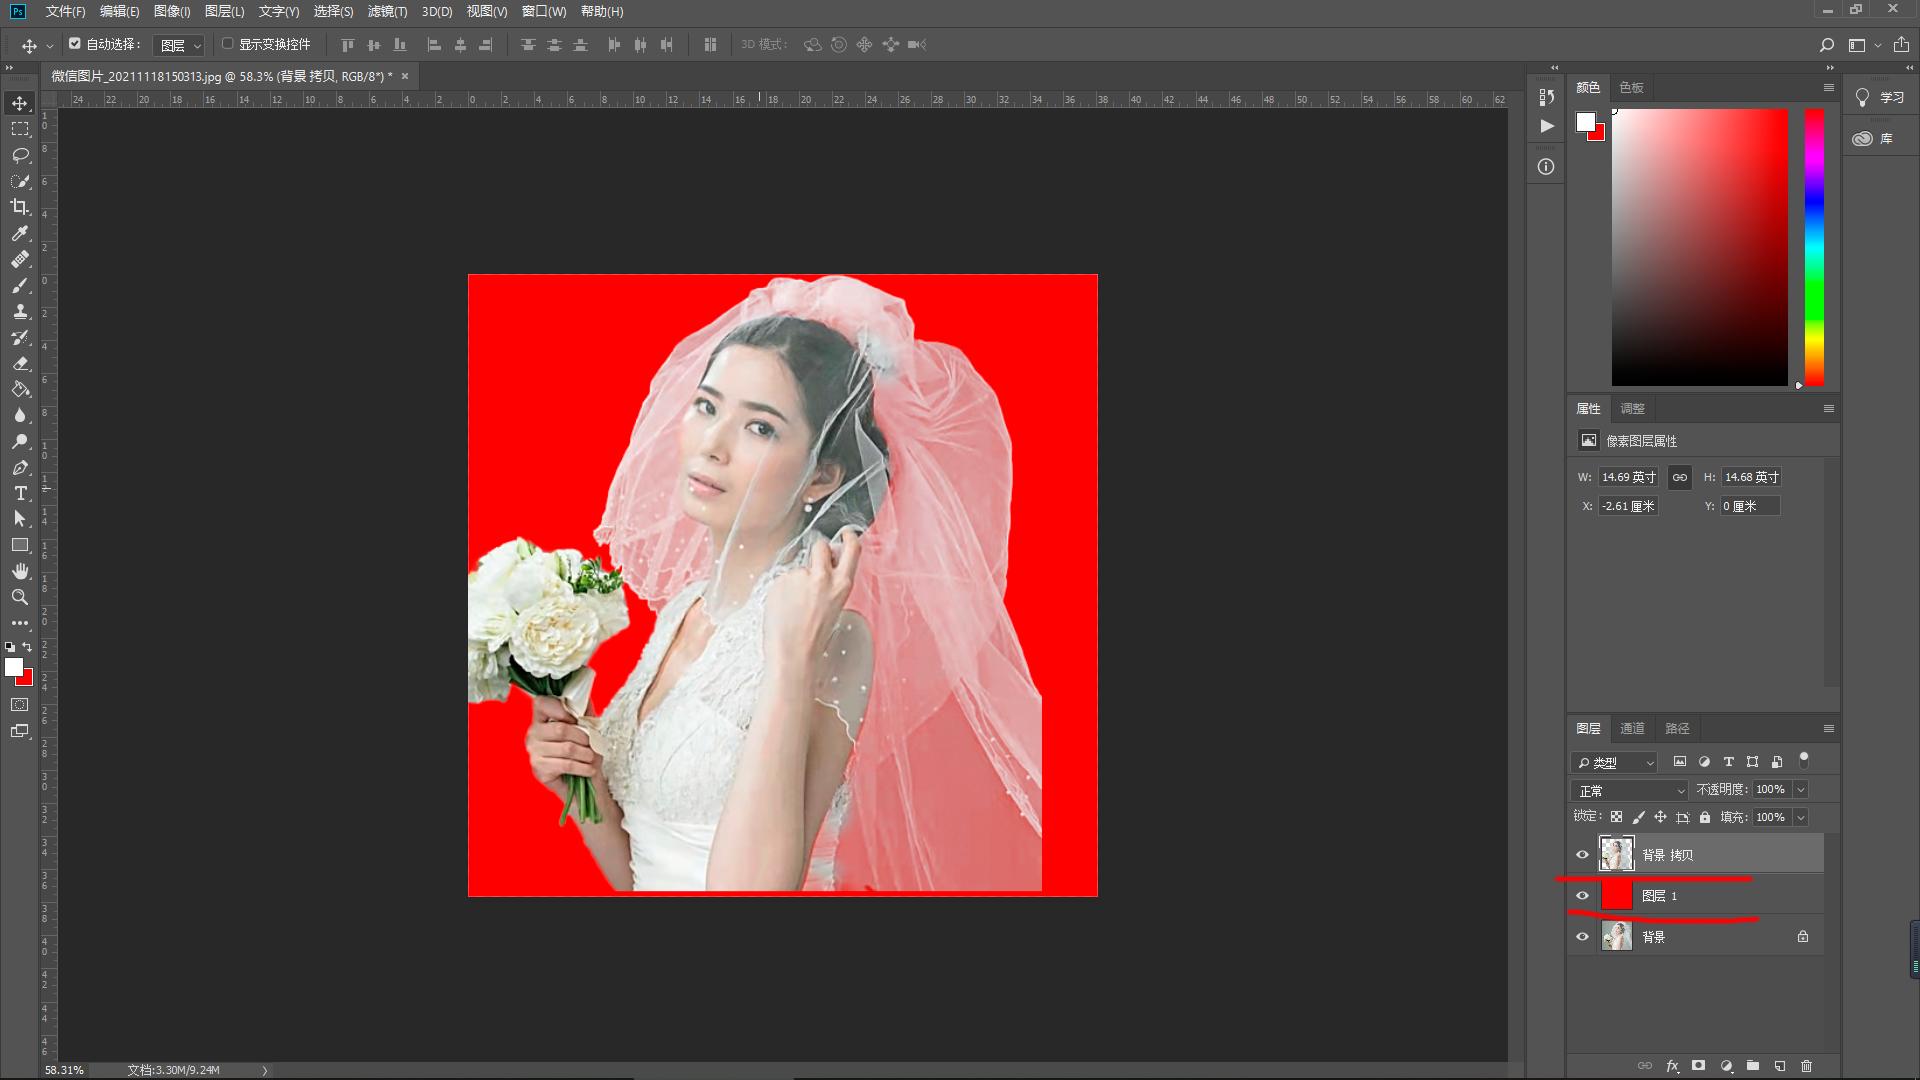
文章插图
文章插图
四、选择并遮住扣图
1.打开图像复制图层,执行选择—选择并遮住 。
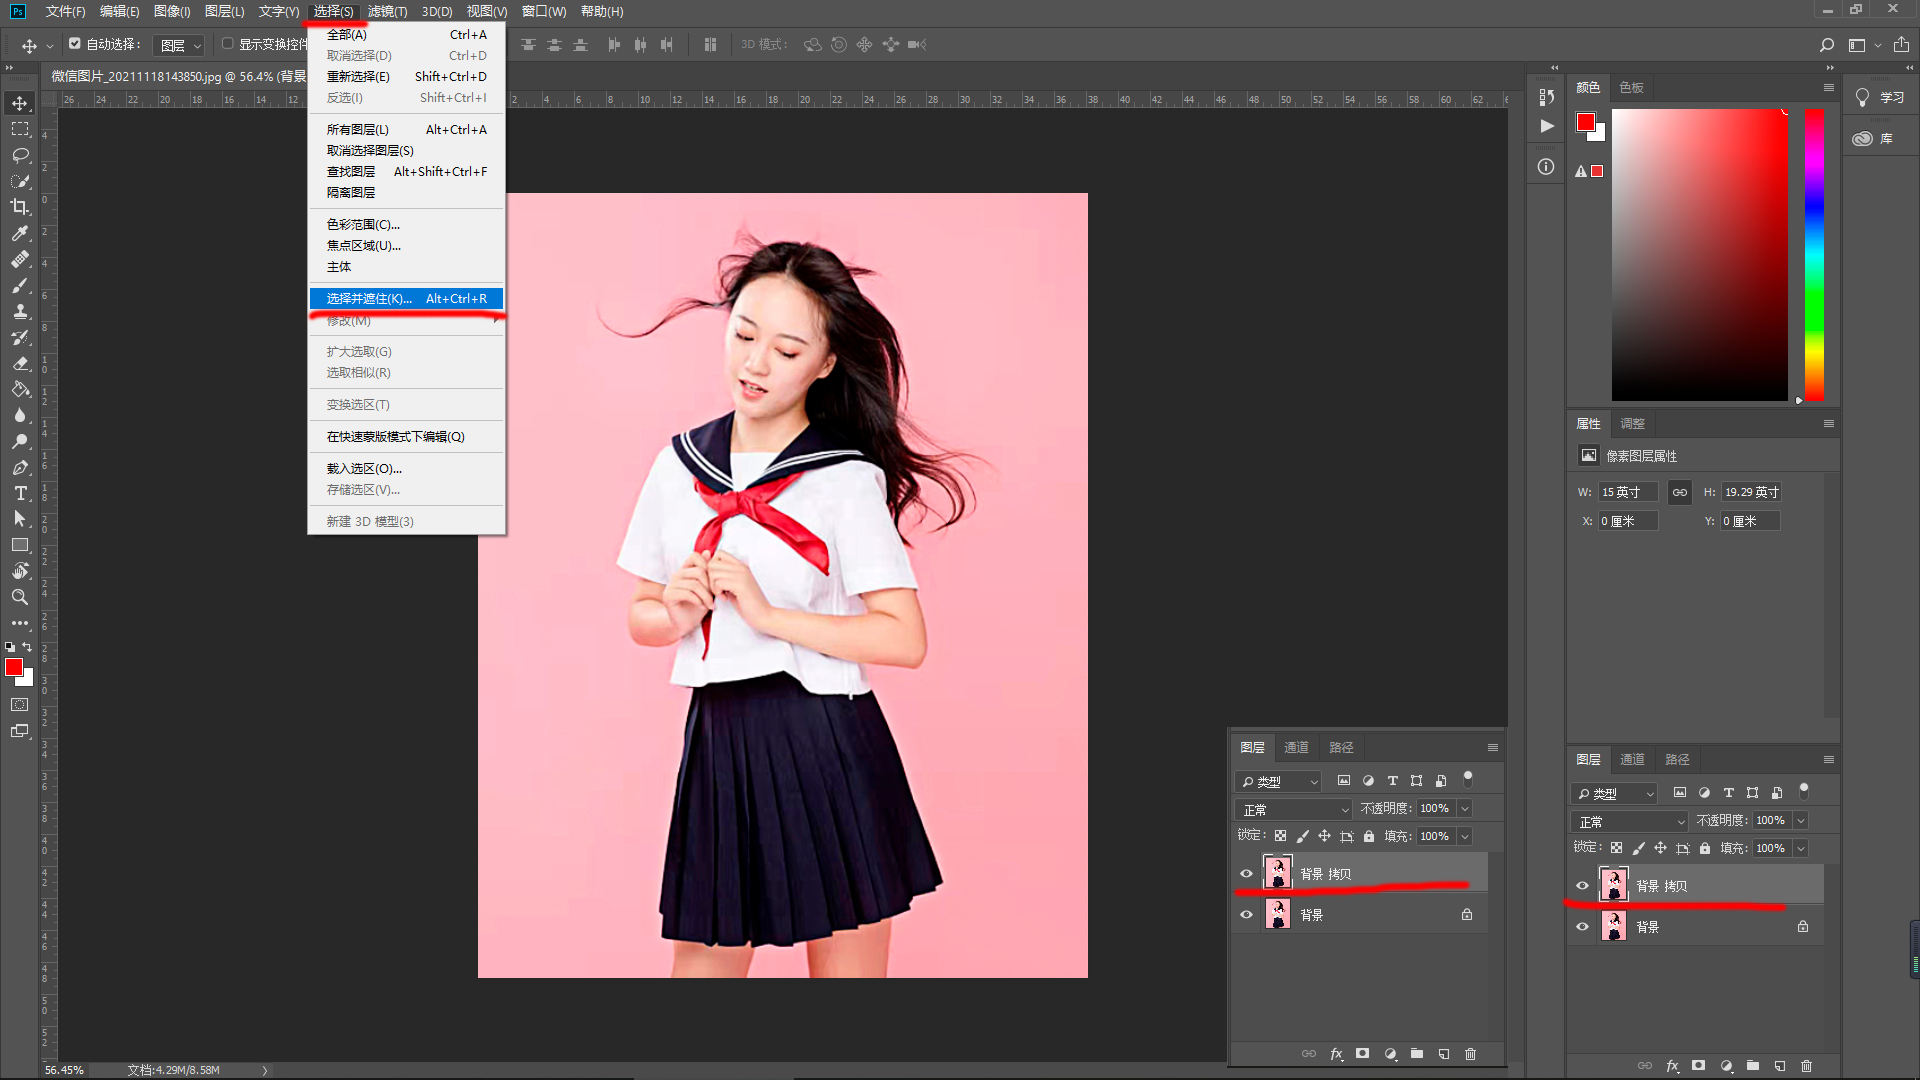
文章插图
文章插图
2.根据1—2—3步骤设置 。
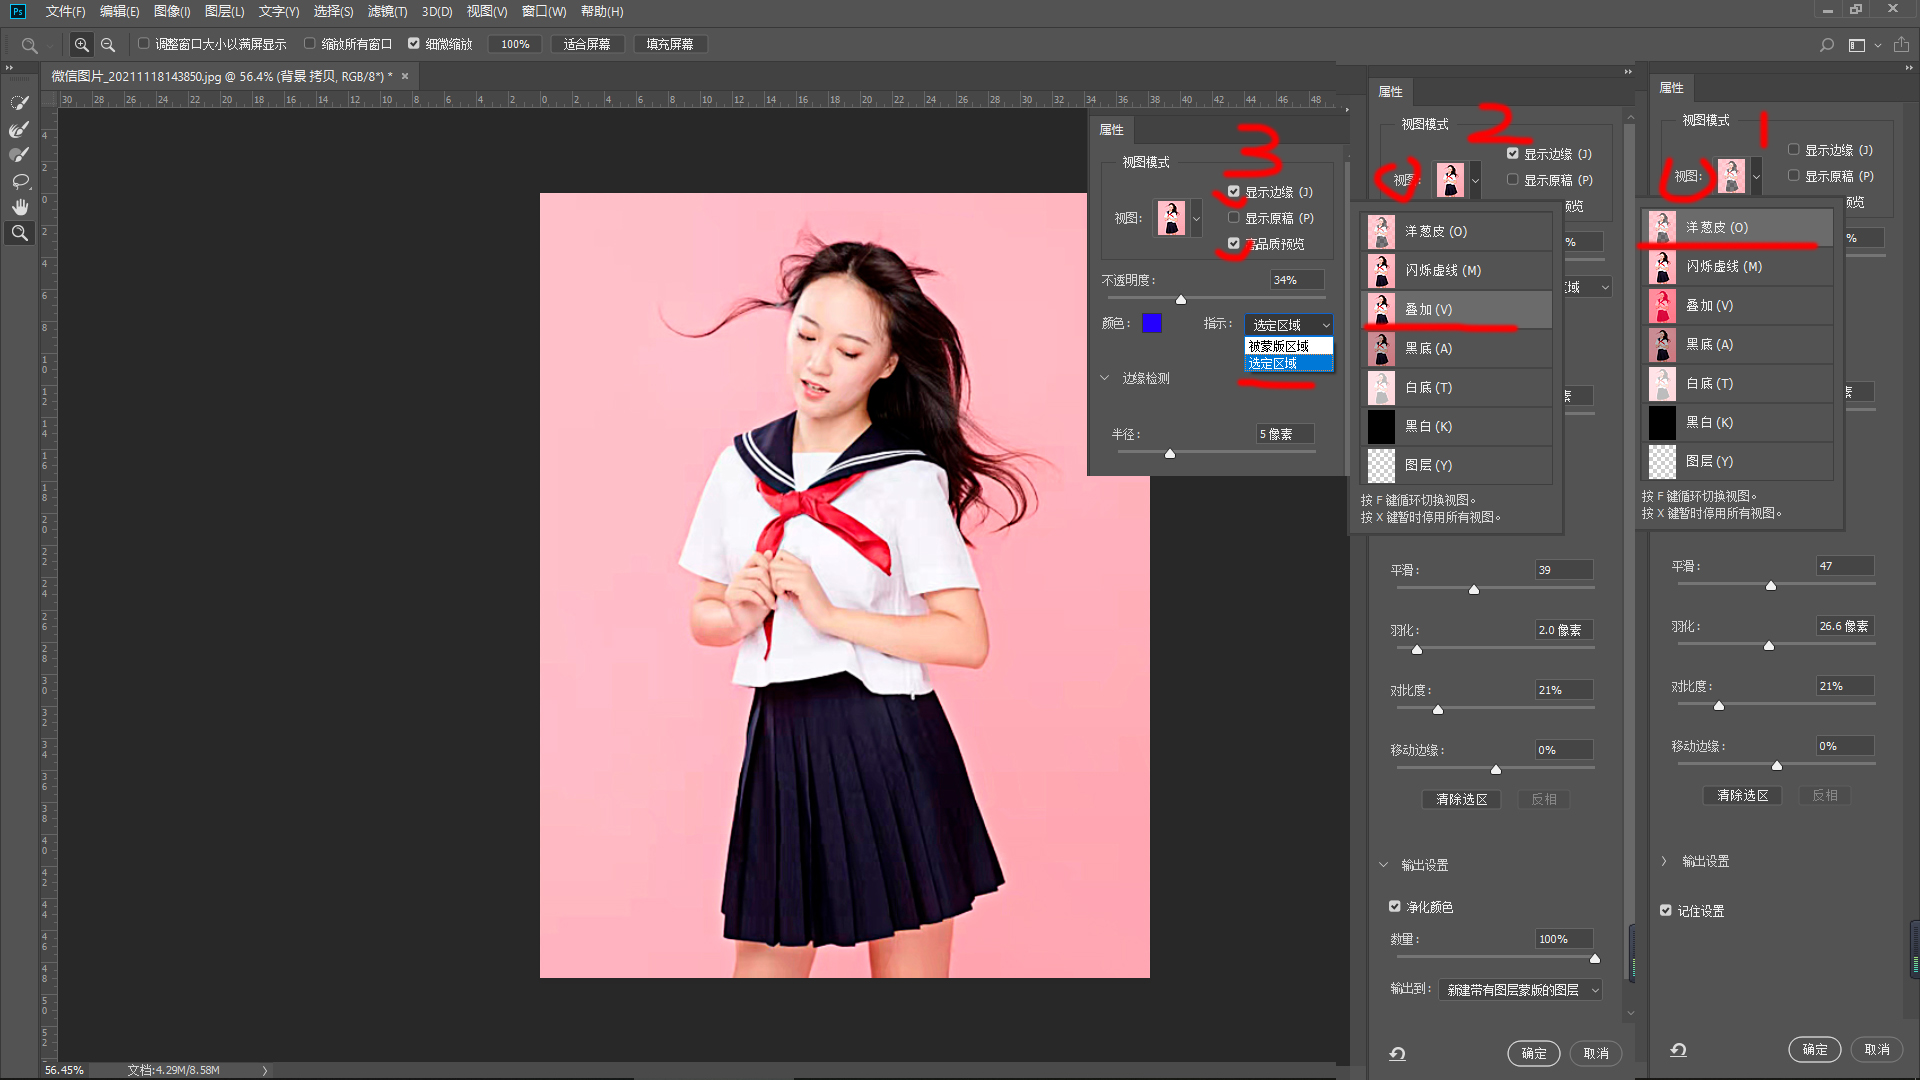
文章插图
文章插图
3.用左边的快速选择工具选取扣出主体 。
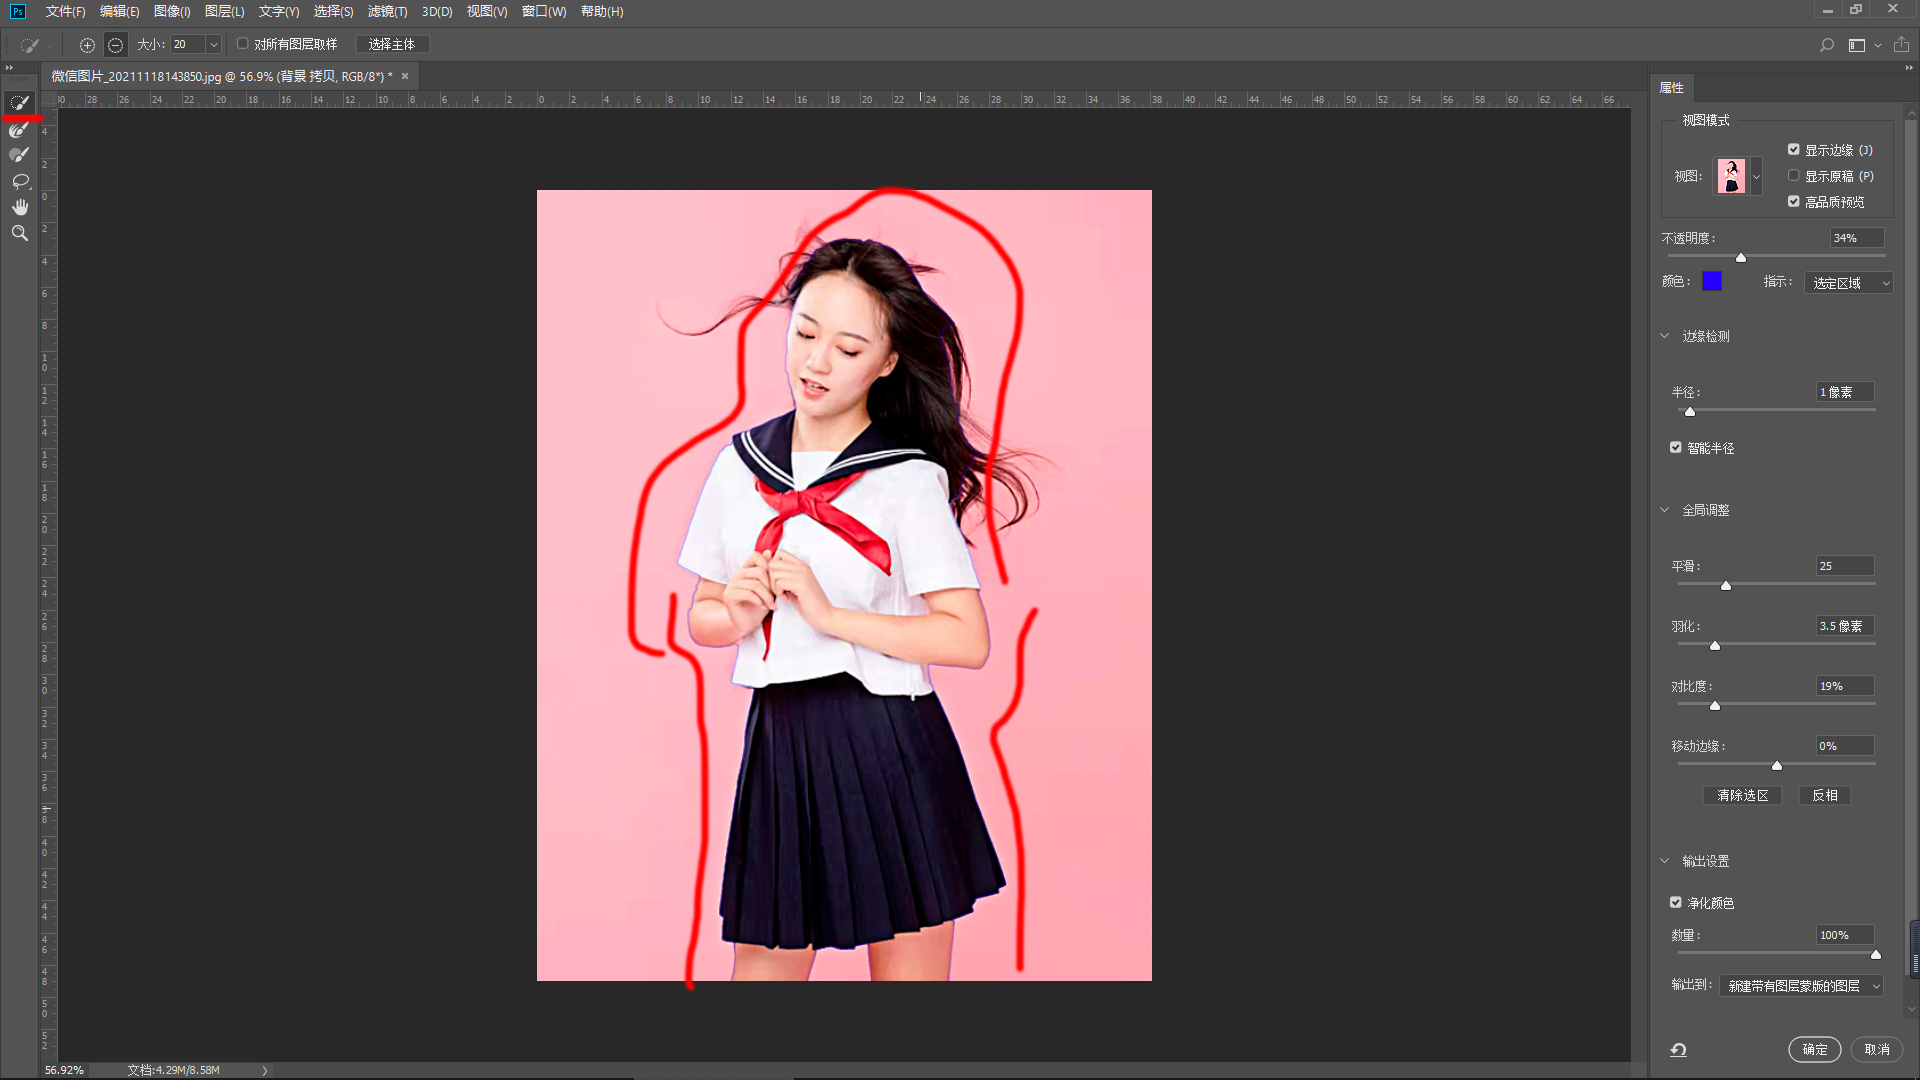
文章插图
文章插图
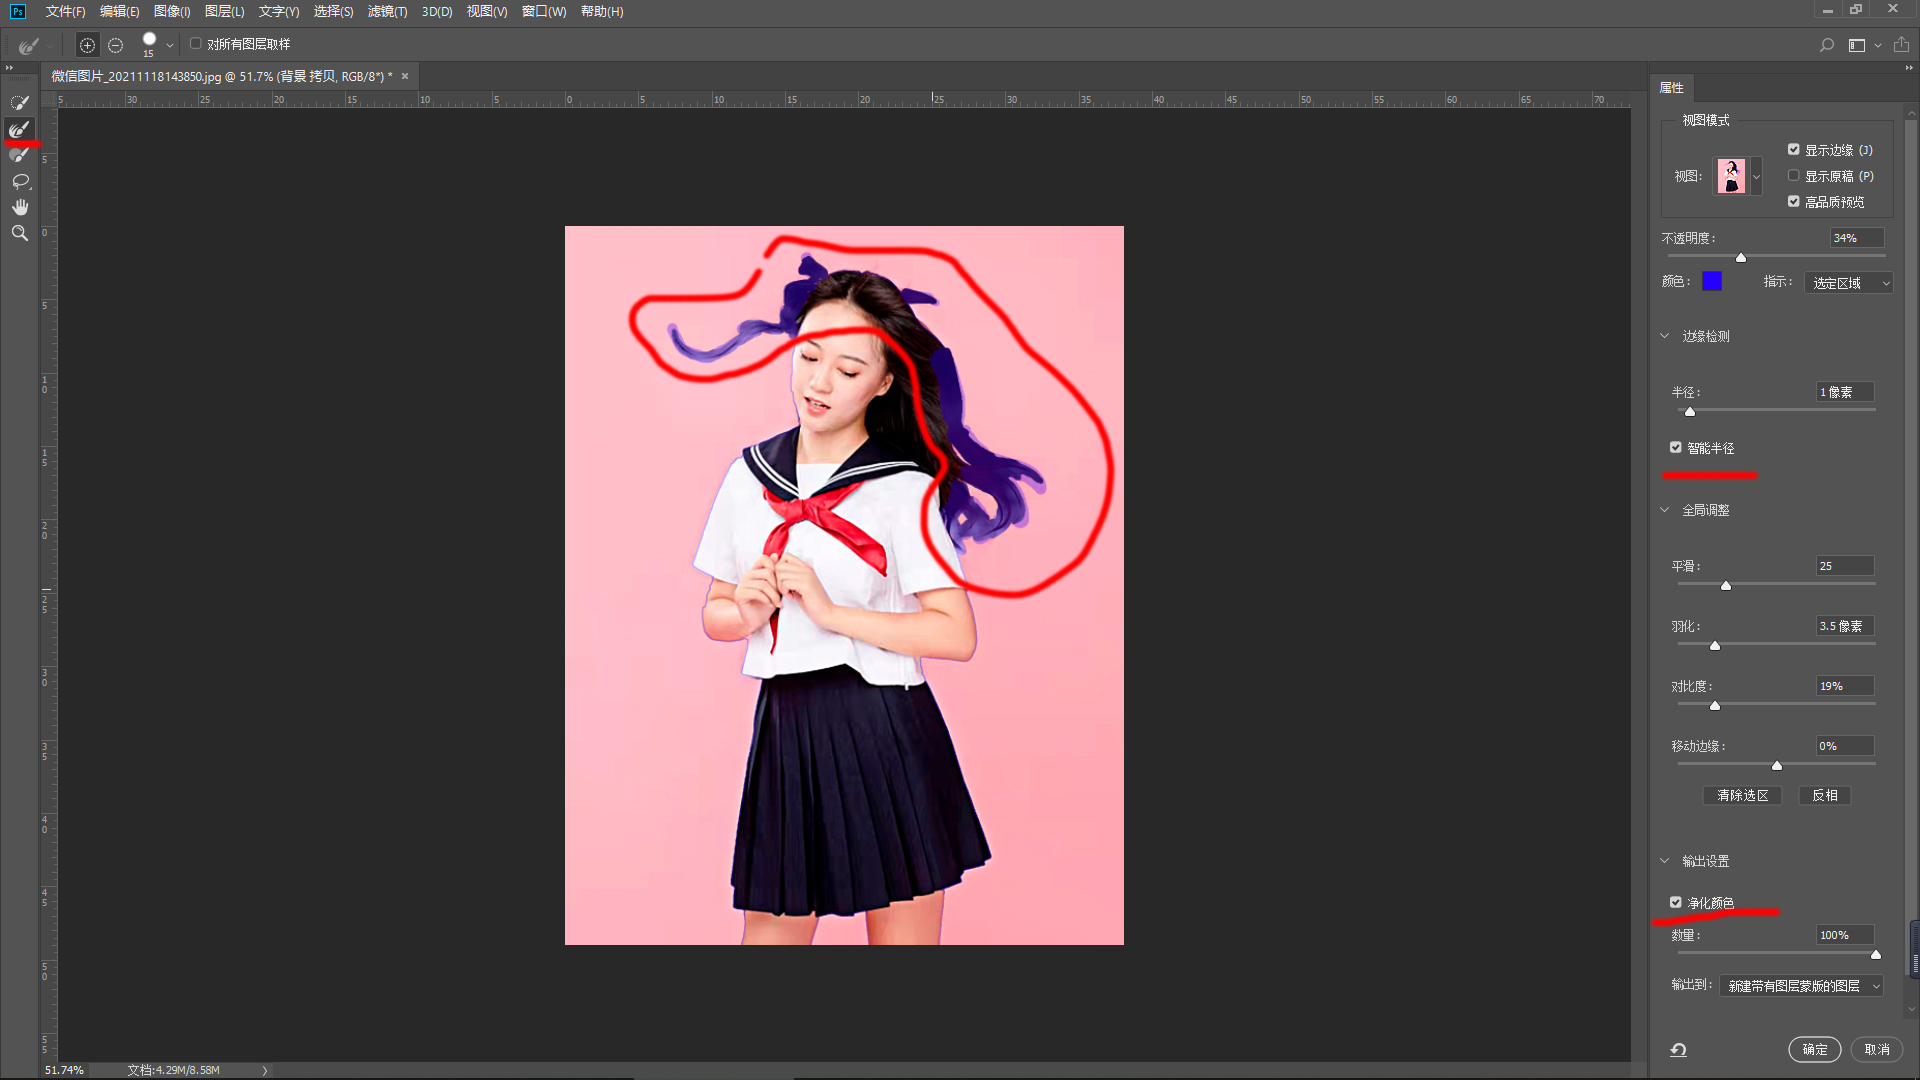
4.用左边的画笔工具涂抹出没选中的头发部分 。智能半径勾选,净化颜色勾选,然后确认 。
文章插图
文章插图
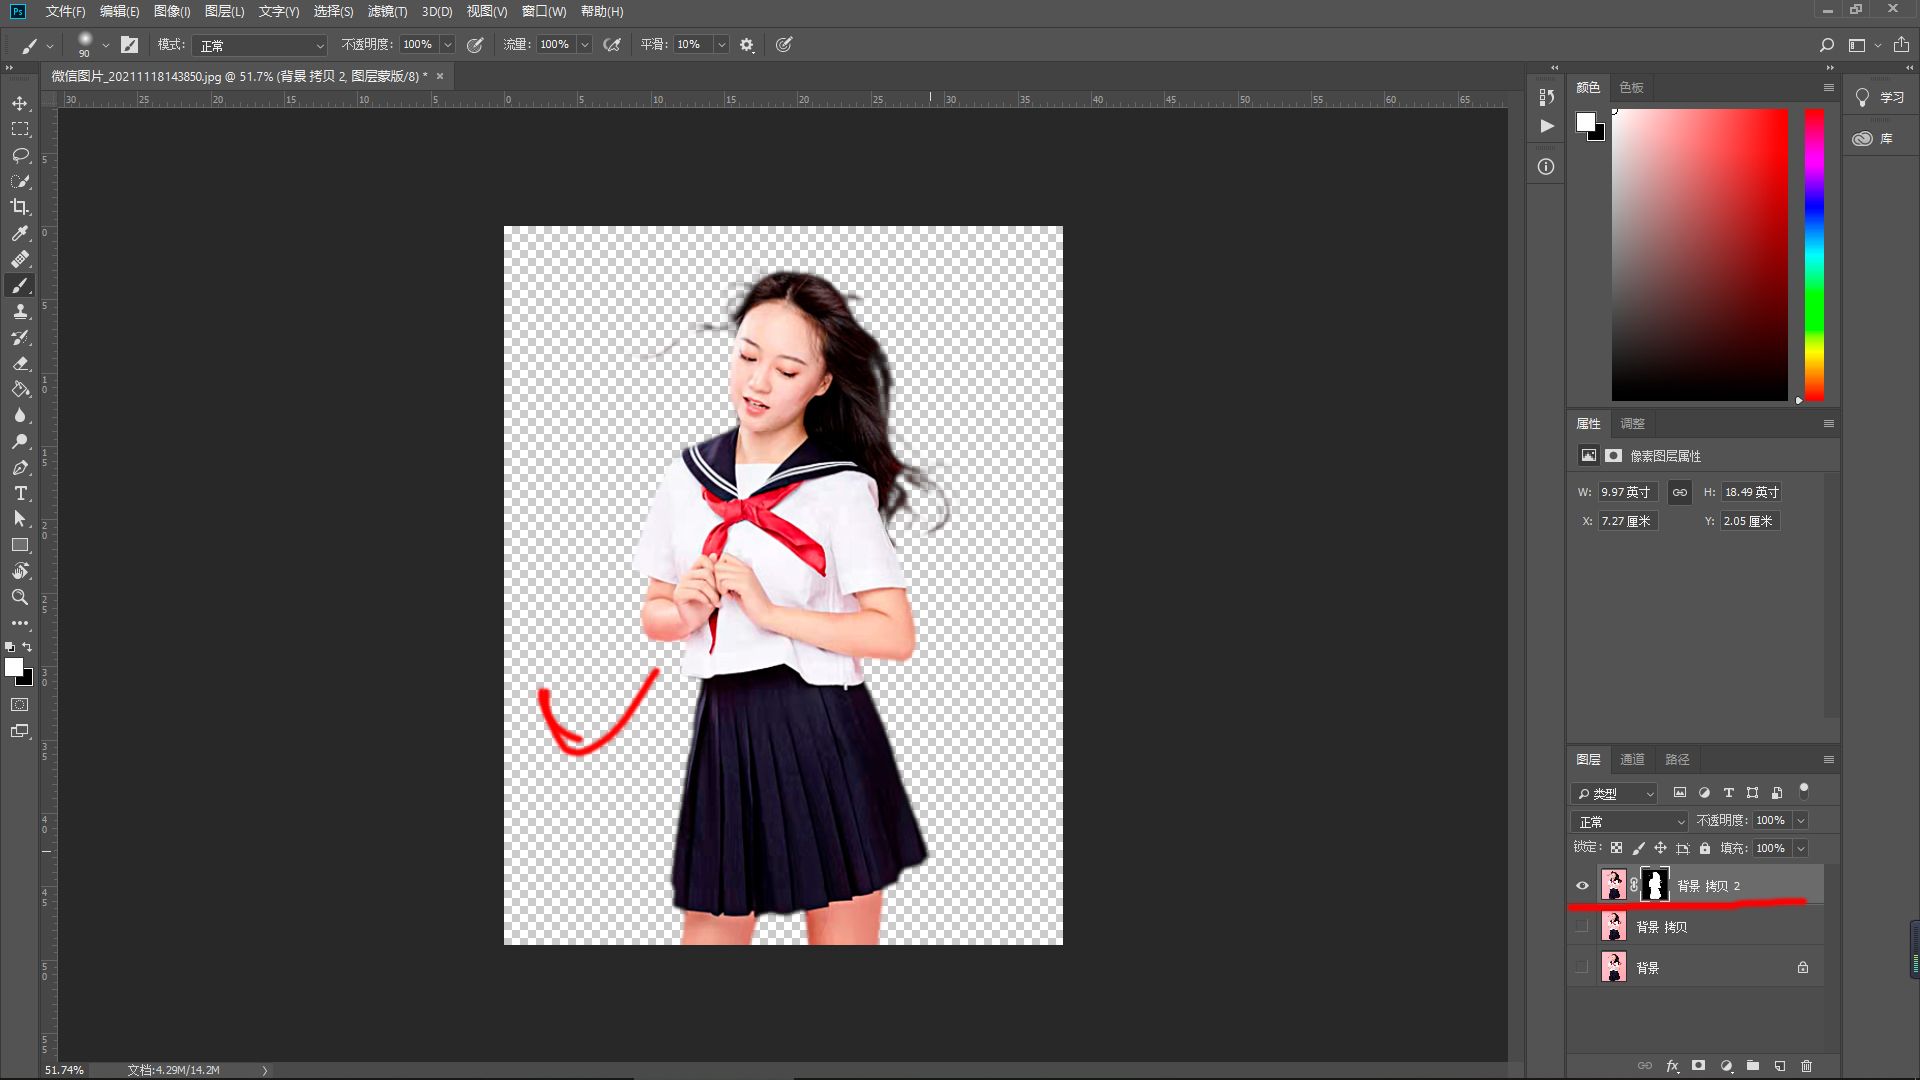
5.扣出如下图,
文章插图
文章插图
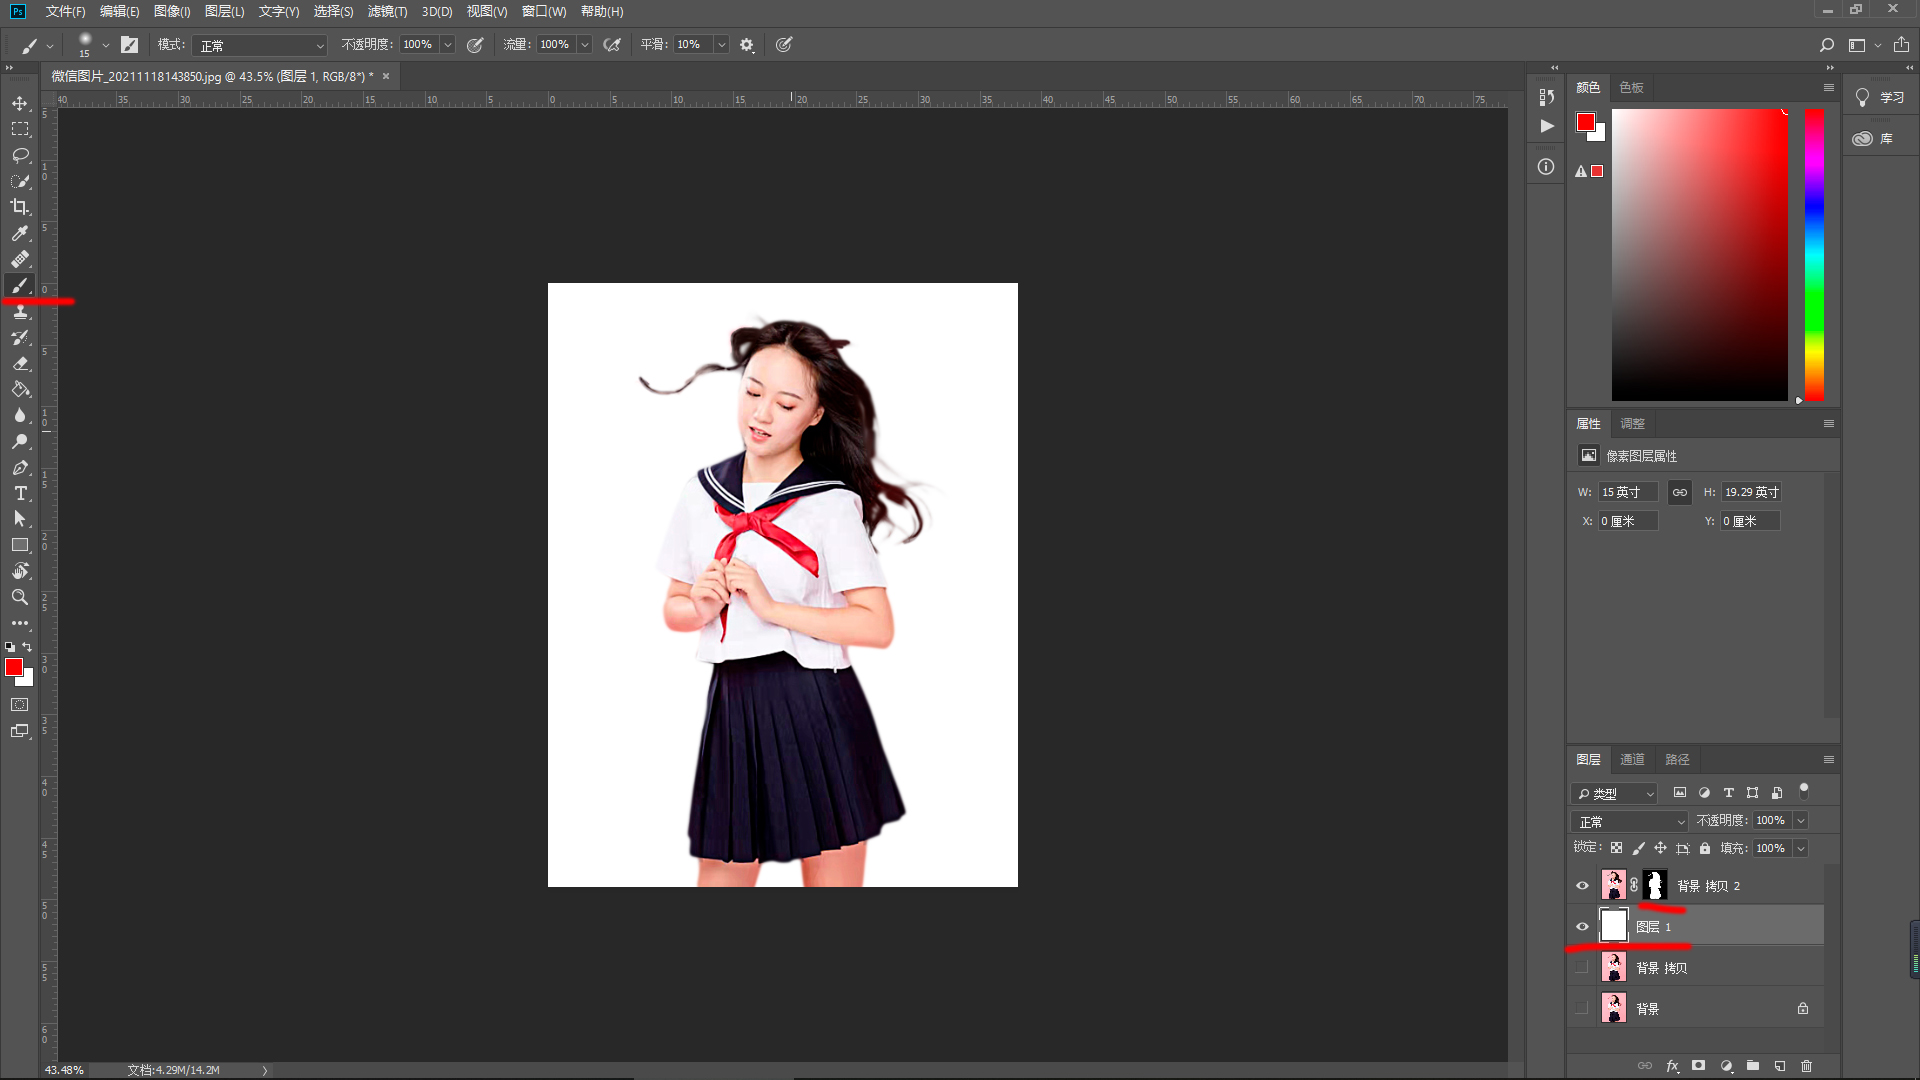
6.没扣好的部分用画笔在蒙版上涂抹,修整 。
文章插图
文章插图
五、插件扣图
现在还在用cs4以前版本的,就可以用抽出滤镜了,以后的版本去掉了,不过我们也可以下载添加上,原理和选择并遮住原理一样,所以我们就不展示了,需要的评论区扣1 。
【套索选好后怎么抠出来 ps套索工具怎么抠图】废话不多说,希望对大家有帮助,有啥问题评论区见 。
推荐阅读


- 掏心窝|放弃iPhone13,入手华为P50 Pocket后的60天,说几点掏心窝的话
- pro14|开学倒计时,你的开学新装备选好了吗?这里有款笔记本电脑在召唤
- excel|对比测试11代酷睿的华为旗舰笔电后,发现M1被神话了?
- 投稿|员工行为几乎全裸?深信服“监控门”背后
- 黑马|华为跌出国内前五后,“国产黑马”没让人失望,第一确实有点厉害
- 小米Civi|客观分析小米Civi使用2个月后心得体验
- ios|苹果公司停止签署iOS 15.3 更新到15.3.1后无法降级
- 果粉|继耳机孔和充电头之后,苹果或将再开一个坏头?果粉:难以理解
- xy s|三星公布S22系列设计背后的故事 高端源于简洁的理念
- 消费者投诉|消费者投诉:ROG笔记本电脑损坏,售后拒绝换机